How to install and configure Linux,Apache,Mysql(Mariadb) and PHP (a.k.a LAMP) in Centos 7 / RHEL7
1.Introduction
LAMP (Linux, Apache, Mysql & PHP ) is an open source web development platform that uses Linux as the operating system, Apache as the Web server, MySQL as the relational database management system and PHP as the object-oriented scripting language. It is powerful and also comparatively simple and easy to use. This article will help you configure LAMP in Centos7.
2.Requirements
Operating System: Centos 7 or RHEL 7
Before you begin LAMP INSTALLATION , you should have a server with root user privilege. By completing steps mentioned below you can configure LAMP in your server.
3. Install Apache
We can install Apache easily using CentOS’s package manager, yum.
# yum install httpd
Afterwards, your web server is installed , you can start Apache on your sever:
# systemctl start httpd.service
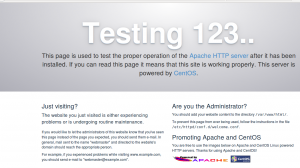
Now you can check webserver by using server IP address in your browser:
http://your_server_IP_address/ >>>>> here it is 138.201.3.27
Now you can see the default CentOS 7 Apache web page. Please see some sample screen shorts below,

4. Install MySQL (MariaDB)
MariaDB is one of the most popular database servers in the world. It’s made by the original developers of MySQL and guaranteed to stay open source.
# yum install mariadb-server mariadb
When the installation is complete, we need to start MariaDB with the following command:
# systemctl start mariadb
Now your mysql database is running.You can access database without any password its not secure so we need to provide password protection.
# mysql_secure_installation
The prompt will ask you for your current root password. Since you just installed MySQL, you most likely won’t have one, so leave it blank by pressing enter. Then the prompt will ask you if you want to set a root password. Go ahead and enter Y, and follow the instructions:
Enter current password for root (enter for none):
OK, successfully used password, moving on...

Setting the root password ensures that nobody can log into the MariaDB
root user without the proper authorization.

New password:
Re-enter new password:
Password updated successfully!
Reloading privilege tables..
 ... Success!
After this when you try to access database with out password it may show an error like this:
[root@arunima-centos7 ~]# mysql
ERROR 1045 (28000): Access denied for user 'root'@'localhost' (using password: NO)
You set a mysql root password for your database server so from now on you can’t access it without password.
“root” session do not know password to mysql root user.
If you want to make easier to access your mysql create a .my.cnf in /root/ and add the following content
# touch /root/.my.cnf
# vim /root/.my.cnf
[mysql]

user = root
password = mysqlrootpassword
where of-course “mysqlrootpassword” is your password for mysql’s root user so when you execute mysql command it uses this password.
Install PHP
PHP is the component of our setup that will process code to display dynamic content. It can run scripts, connect to our MySQL databases to get information, and hand the processed content over to our web server to display.
# yum install php php-common php-gd php-mysql
After installing PHP, you should restart apache.
# systemctl restart httpd.service
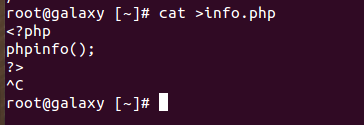
In order to test that our system is configured properly for PHP, we can create a very basic PHP script.
We will call this script info.php. In order for Apache to find the file and serve it correctly, it must be saved to a very specific directory, which is called the “web root” or “document root”.
In CentOS 7, this directory is located at /var/www/html/. We can create the file at that location as shown below:

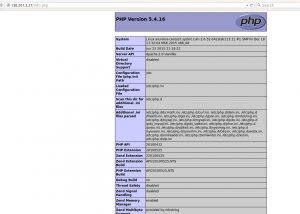
Now we can test whether our web server can correctly display content generated by a PHP script.
http://your_server_IP_address/info.php
Please see a sample screen short of phpinfo below,

